Skylum Luminar Neo Review
Here’s a quick and fun review of Luminar Neo! You can use the code TREY10 to get $10 off the yearly or lifetime plans. For those of you who are existing Aurora HDR users, that entitles you to grab the HDR extension for Neo with special pricing, depending on the version you have and for some of you that might even mean free! Just be sure to sign up for Neo with the same email you used to register Aurora HDR to get access to the best pricing. 🙂
Before we begin, here’s a few images I’ve produced with Neo to get you in the mood…


And now, on with the show…
Why Luminar Neo?
I’ve used Neo exclusively for the last three months as I slowly decouple myself from Lightroom! I had grown so accustomed to LR and their way of doing things that I was always a bit lazy about switching to a new tool. But now I am glad I am using Neo all the time!
I think it’s important for artists to always try new tools. It keeps the brain very plastic and, counterintuitively, I am sure after decades of experience that it is important to stay “uncomfortable” and always try new things. I think there is something in the ever-changing brain that needs this discomfort. It shakes things up. It makes you look at things in a new way. It makes you experiment with new aspects of post-processing that may never have occurred to you before.
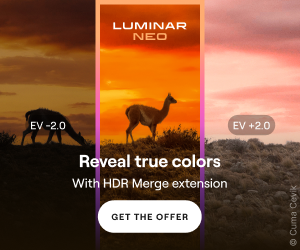
In addition to that, it’s been a few years now since the latest version my collaboration with Skylum, Aurora HDR, was released. There was limited functionality between previous Luminar and Auroras in the past but now HDR available as a add-on/extension in Luminar Neo so it’s a much more rounded experience with support for all the latest cameras, etc all added in.
What do I like best about Neo? I simply love the wild array of tools.
You can do, hrmmm, probably 20x more things in Neo than you can in Lightroom. This can also be a bit scary via the old paralysis-by-analysis paradigm, but this is a situation I quite like!
You can do anything you can do in Lightroom, but the flow may be a bit different. Well, let me qualify that. You can do any of the “Edits” you can do in LR. Neo currently lacks the same sort of Library management of LR. Well, that’s not entirely true either. They just have a different system that is based on your existing file infrastructure on your hard drive. I don’t even know if I’m explaining that right. You can indeed organize your photos into galleries, favorites, and the like, but it simply maintains the library in a different way. I have not figured out a “smooth” way to integrate non Lightroom images with my last 10+ years of LR library management. I don’t really want to think about that, so I’ll just use the avoidant nature of my personality and figure that out another day.
One negative? I just can’t figure out. It exports SO slow. For example, I just exported 12 images that were processed in Neo (these are 48 megapixel Sony images) – and it took about 30 minutes on my M1 Max based Mac. I can’t figure out why it is so slow. I’ll ask Skylum now and update this if we can figure it out!
So, this review is mostly via screenshots! Scroll down and read each caption to get a quick look at some of the coolest features of Neo!
I’ll add more soon! Enjoy!

HDR Merge is very easy and fun – Once you have imported your files (Note you can just use one RAW File too), simply drag them to HDR Merge.

Here, you can see I dragged them all over to the right.

If you click the little gear, you can do adjust the settings for the HDR merge, which are the same you know and love from Aurora HDR.

Here is the little gear you click to get into the weeds.

The currently available extensions add a lot of functionality. Not everyone will need them all though so it’s handy to be able to pick and choose to save some cash.

The extensions can be added from up here.

Anyway, back to HDR… here is the original photo – the middle exposure.

And here it is after right after the merge, but we can do more with it still of course.

This is the final result after many edits – the Edit area keeps track of your edit history and there are loads of sliders/options to play with.

Presets are fun and simple too.

I usually just play around with them to find one that works – this is a fairly subtle one.

And, after you make your choice, you can go into the Edit area to adjust the extremeness of the preset.

You can also save your own presets by choosing the option at the bottom of the photo – it took forever for me to find that one.

And here is one of my presets – no I am not selling any yet but maybe some day when I am not being so lazy.

Some presets come with light leaks and stuff, which you can see in the top left as another layer that has been added.

And of course you can add more light leaks or other effects.

Here is a more advanced technique where you can duplicate a layer and do things like add double-structure to give it an illustrative look.

And you can adjust how extreme of a look you desire.

Here is a very similar photo to above with a very different effect – this Relight area is one of my new faves.

Now a bit of fun…

You can swap out the sky if you wish – it’s quite amazing how it works.

After you swap out the sky, there are countless suboptions to tweak it out.

Now let’s look at an example of face and eye adjustments for portraits – I’ll make this one a little toooo extreme just to show what you can do.

I applied a preset and then opened up the face panel – I actually like her freckles, but you can use this to get rid of other blemishes and stuff – some humans dig that stuff.
And I’ve gone a little over the top here, but you can see the changes quite clearly.

Another fun effect is the sunrays that have incredible adjustments that look fairly believable.

Look how many options there are.

I can get lost in these options forever.
The End. For Now… remember, if Luminar Neo tickles your fancy you can grab it here and use the code TREY10 for a discount on the annual and lifetime subs.
Oh… go on then… a few extra examples…